Did you know you can take stunning macro photos on iPhone?
Thanks to advancements in smartphone technology, your iPhone can now capture the intricate beauty of tiny subjects with incredible detail.
Whether you’re fascinated by the delicate patterns on a butterfly’s wing, the vibrant texture of a flower petal, or the intricate world of everyday objects seen up close, iPhone macro photography opens up a whole new dimension of creativity.
In this guide, I’ll walk you through the tips, tricks, and techniques you need to take amazing macro photos on your iPhone, turning the mundane into the magnificent.
But first, what is macro photography?
What Is Macro Photography?
Macro photography is a genre that involves taking extreme close-up pictures of small subjects, making them appear larger than life in the photograph.
With this type of photography, you capture intricate details that are not easily visible to the naked eye, such as the textures of a flower petal, the patterns on an insect’s wings, or the fine details of everyday objects.

iPhone 14 Pro Max, native macro mode. Copyright © by Michael Southon 2023
Here are some key characteristics of macro photography:
- Close-Up Focus: Macro photography typically involves focusing very closely on the subject. True macro lenses offer a 1:1 magnification ratio, meaning the subject appears life-sized on the camera’s sensor.
- Detail and Clarity: Because macro photography focuses on small subjects, it requires high detail and sharpness. This often necessitates good lighting, a steady hand, or a tripod.
- Shallow Depth of Field: At close focusing distances, the depth of field (the area in focus) is very shallow, leading to a blurred background and a sharp subject, which helps emphasize the subject.
- Special Equipment: While some iPhones have built-in macro capabilities, you’ll get the best results with dedicated macro lenses. These lenses are specifically designed for iPhones.
- Applications: Macro photography is popular in nature photography (flowers, insects), product photography (jewelry, electronics), and artistic photography, where it creates abstract images from everyday objects.

iPhone 14 Pro Max, native macro mode. Copyright © by Michael Southon 2023
iPhones and Macro Photography
Starting with the iPhone 13 Pro, Apple has added a macro function to the iPhone camera.
As of 2024, these iPhone models have a built-in macro photography capability:
- iPhone 13 Pro
- iPhone 13 Pro Max
- iPhone 14 Pro
- iPhone 14 Pro Max
- iPhone 15
- iPhone 15 Pro Max
- iPhone 15 Plus
These iPhones use the ultra-wide camera lens to capture detailed close-up shots. You can focus as close as 2 centimeters from an object, opening up a whole new world of photography possibilities.

\
If you have an iPhone 12 or earlier, you will have to use a third-party macro photography iPhone app or buy an iPhone macro lens. More about these two options later in the article.

iPhone 14 Pro Max, native macro mode. Copyright © by Michael Southon 2024
Using the iPhone Camera For Macro Photography
If you’re using an iPhone 13 or later, you have a built-in macro mode. But you need to go into Camera Settings and turn on ‘Macro Control’:

With this setting turned on, your camera will automatically enter macro mode when you try to focus on an object 15 cm away or less. In macro mode, a small yellow flower icon will appear in the camera app:

The ultra-wide lens, used in macro mode, is specifically designed with a shorter minimum focus distance, allowing you to focus on subjects as close as two centimeters away.
One thing to be aware of is that in macro mode, all the zoom settings beyond .5 are digital zoom (as opposed to optical zoom). In other words, the zoom is achieved by cropping the photo and then stretching the image over a wider frame. So, any macro photo using 1x, 2x, or 3x will have a lower resolution than the same photo taken on .5.
However, you can compensate for this by shooting in RAW mode, which gives you more pixels per square inch.
6 Tips For Composing Perfect Macro Photos on iPhone
Composing the perfect macro shot on an iPhone involves technical understanding and artistic vision. Here are some tips to help you make the most out of your iPhone’s macro photography capabilities:
1. Stabilize Your Phone
Macro photography is particularly sensitive to movement. When your lens is only centimeters away from the object, even slight shakes can cause blurriness. Use both hands to hold your iPhone steady, or consider using a tripod or a stable surface to ensure sharp images.
2. Stabilize The Object of Your Photo
Even a slight wind can easily move a flower, resulting in a blurry shot. And the longer the flower stalk, the more susceptible the flower is to movement.
One way to deal with this is to hold the stalk of the flower with one hand while using the other hand to press the shutter button on the iPhone.
If the object of your macro photo is a dead leaf, a twig, or something that you can easily move, consider taking it indoors, away from the wind.
3. Focus and Exposure
Take advantage of the iPhone’s tap-to-focus feature. Tap on the screen where you want to focus to ensure the subject is sharp. Additionally, you can adjust the exposure by sliding your finger up or down after tapping to focus, to control brightness and detail in your shot.
4. Get Close, But Not Too Close
The iPhone’s ultra-wide lens has a minimum focus distance of two centimeters. Ensure you are close to your subject, but avoid getting closer than two centimeters, which will cause the image to lose focus.
5. Use Natural Light
Diffuse light is the best kind of light for macro photography. Direct sunlight creates contrasting areas of light and dark that distract from the object of the photo.
Forests or areas covered by overhanging vegetation are great places for macro photography. You can also wait until the sun has gone down.
6. Bokeh Effect
The best macro photography uses a blurred background to emphasize the subject of the photo. This blurred background is called ‘bokeh’ (from the Japanese word ‘boke’).
Dedicated macro lenses, such as the Sandmarc 25mm lens, are specifically designed to create a blurred background and maximize the bokeh effect.

iPhone 14 Pro Max with Sandmarc 25 mm macro lens. Copyright © by Michael Southon 2023
Using An Add-On Macro Lens
The macro mode on iPhones 13, 14, and 15 is great for close-up photography. But if you want to get really detailed shots, such as the stamens on a flower, you’ll run into a problem.
As you move closer and closer to your subject, the camera will eventually stop acquiring focus. This is because the minimum focus distance for iPhone macro mode is 2 centimeters.
The ultra-wide angle lens on the iPhone is simply not powerful enough to focus on something closer than that.
And that’s when you need an add-on macro lens.
I have a 25 mm Sandmarc macro lens, which provides 10x magnification.
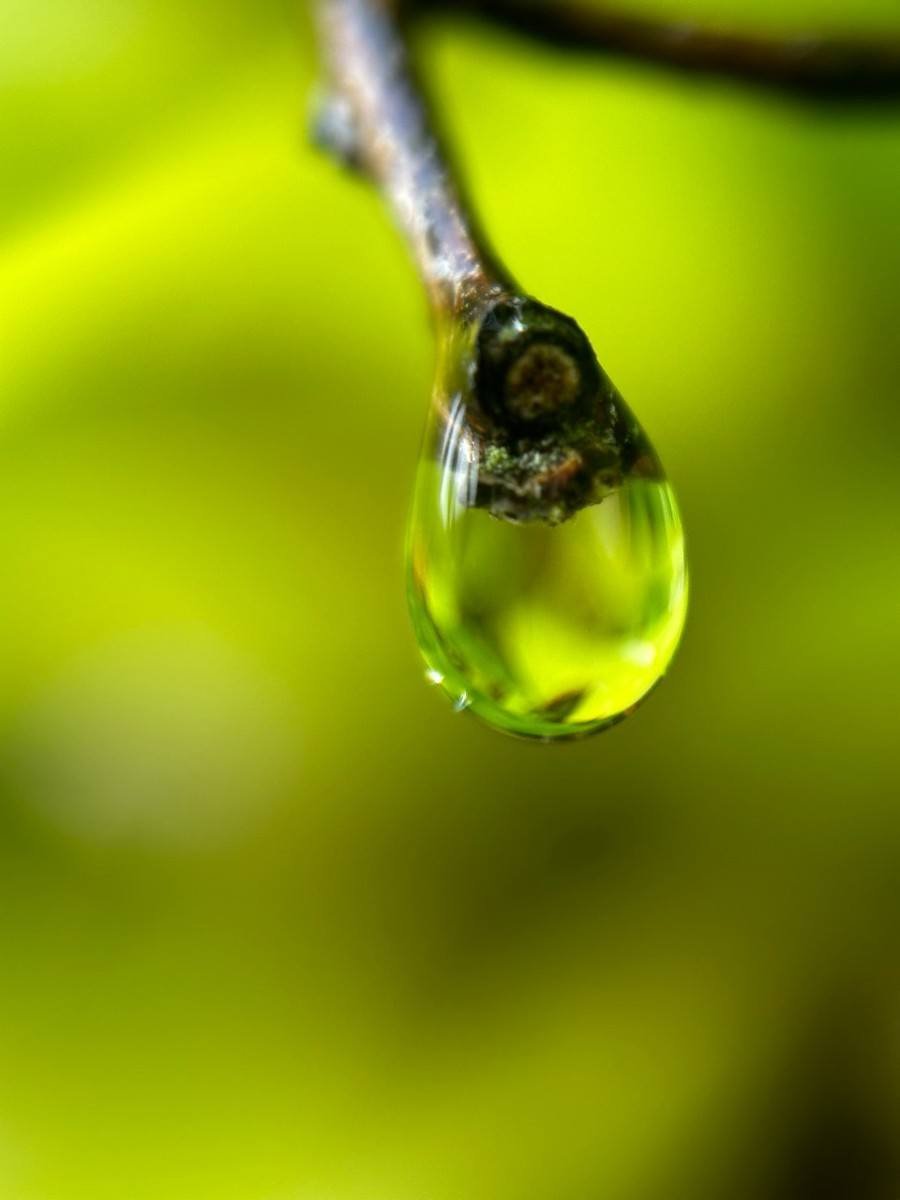
With this lens, you can get very granular photos, such as this image of a raindrop:

iPhone 14 Pro Max with Sandmarc 25 mm macro lens. Copyright © by Michael Southon 2023
The Sandmarc 25 mm macro lens comes with a special phone case which you screw the lens into. Alternatively, you can attach the lens to your camera using the clip.

When you first try to use the Sandmarc macro lens (or any other add-on macro lens), you’ll encounter a problem: half the frame is obscured by the lens casing, as seen in this image:

This happens because when there isn’t enough light in macro mode, the iPhone automatically switches to the adjacent lens, which is why you can see the outline of the add-on lens.
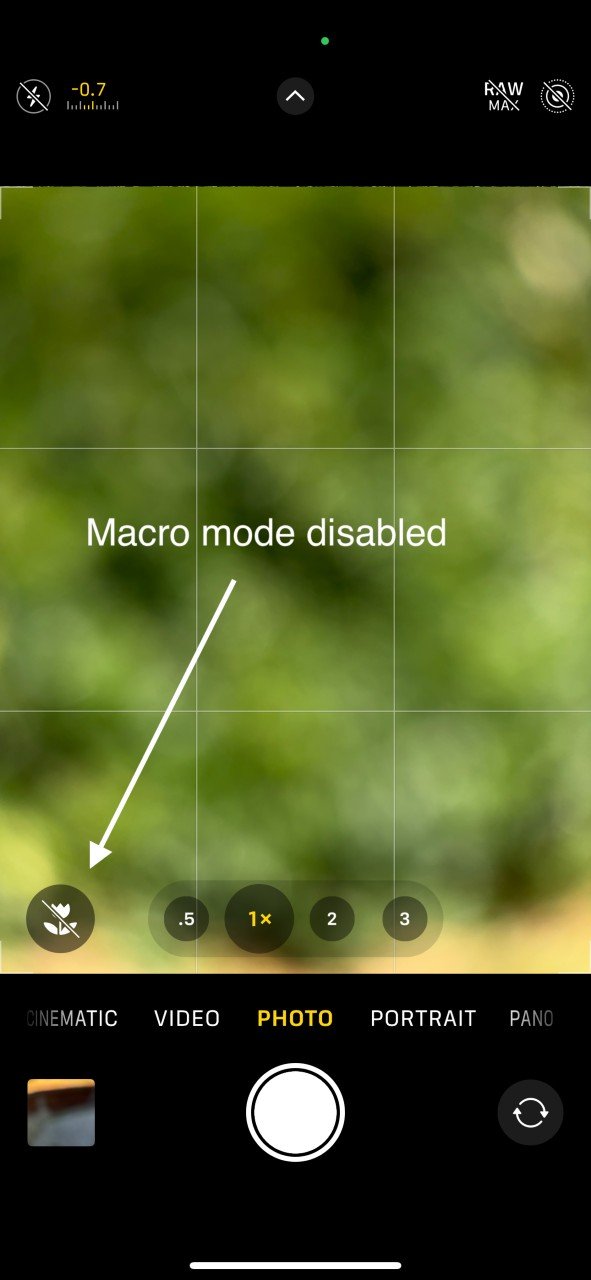
To prevent this from happening, tap on the macro icon (the flower symbol) to disable macro mode:

Then, re-attach your macro lens. You’ll now be able to use the add-on macro lens without any obstruction.
One problem with macro photography, especially when using an add-on macro lens, is that you have to get really close to your subject (with the Sandmarc 25 mm lens, the focal distance is 10 to 15 mm).
And that means your iPhone will sometimes block the light.
This usually happens when shooting in direct sunlight, so try to find diffuse light for your macro photography.
If direct sunlight is casting dark shadows on your subject, try using a diffuser (such as the one that comes with the Sandmarc lens).
Another issue that arises when using an add-on macro lens is handshake. Even a slight movement can result in a blurred photo with higher magnification and the subject only millimeters from the camera.
Consider using a tripod to reduce handshake. In general, I find tripods clumsy things that limit my ability to get the exact angle I want. To get around this, try holding the tripod in one hand, extending one of the legs, and using that to brace the tripod against the ground.
That little bit of extra stability will give you a sharper photo.
Another way to reduce camera shake is to use a remote shutter release. These devices connect to your phone via Bluetooth, allowing you to take photos without touching the camera. They can be bought on Amazon for a few dollars.

Using a Third Party App for Macro Photography
If you have an iPhone 12 or earlier, you can still do macro photography, but you will need a third-party app that overrides the settings in your iPhone camera.
Here are some popular third-party macro photography apps:
Halide Mark II is known for its manual controls and pro-level features. Halide includes a macro mode that leverages the iPhone’s capabilities to get precision close-up shots.
Camera+ 2 provides a range of manual controls and a dedicated macro mode. It’s user-friendly and suitable for both beginners and advanced users.
ProCamera includes a macro mode and offers extensive manual controls, including focus, exposure, and white balance adjustments, making it a powerful tool for macro photography.
Moment Pro Camera is designed to work seamlessly with Moment’s macro lens attachment, but it also offers great manual controls and features for macro photography even without the attachment.
Manual RAW Camera provides full manual control over your camera settings, allowing for detailed, high-quality macro shots. It supports RAW format for higher-quality images.
Conclusion
Macro photography opens up a fascinating world we normally can’t see with the naked eye.
Taking stunning macro photos on your iPhone requires understanding the camera’s capabilities and mastering the techniques for close-up photography.
By leveraging the advanced camera features, using additional accessories like macro lenses, and following best practices for lighting and composition, you can capture amazing details that bring the miniature world to life.
Remember to experiment with different angles, settings, and subjects to discover your unique style. With patience and practice, your macro photography skills will improve, allowing you to transform everyday objects into extraordinary works of art.
So grab your iPhone, get up close, and explore the intricate beauty of the world around you.
Happy shooting!